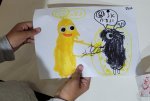
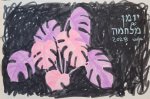
Children Drawing the War

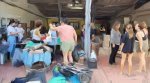
For the past 4 weeks I've been driving down to the Dead Sea, every Tuesday, to draw with the kids.
The hotels in the Dead Sea area have become a refugee camp.
Entire towns were evacuated from their homes near the Gaza strip, and are now living in hotel rooms. Here are some of the things they draw >>
Update 7th December 2023
It's been 62 days since the October 7 Massacre.
138 Hostages are still in Gaza, including the two ginger head babies.
I haven't posted in a while because I'm now driving down to the Dead Sea refugee camp to work with the kids there.
In the past months we have had a horrific war, horrific enough for the terrorists to beg for a ceasefire and release about half of the hostages, mainly children, elderly women and foreign nationals.
Some of the people that came back are on death's door, and speak of the inhuman conditions of their captivity.
They all came back 8-15 kilos thinner.
Now we think we know why they are not releasing the younger women: It's because they were raped, and the even the terrorists feel that will make them look bad.
The UN women said nothing, for two months, their silence was deafening, and they are still barely acknowledging the sex crimes Hamas terrorist committed that day.
Apparently it's #meTooUnlessYou'reAJew

He's still there.
Hamas claims this 4 yr-old, his 9-month brother and their mom are dead.
Then again, some hostages they declared dead suddenly came back during the prisoner exchange, so I can't believe a single word from these monsters.
Illustrated War Journal

After two weeks of dumb grey nothingness, I took out my sketchbook and started an Illustrated War Journal.
I'll upload the pages as I draw them.
They will probably not be in order of events, and style will likely change all over the place, because I'm not planning this out.
It's how I process what happens to me.
I write the texts in Hebrew, look for the translation in the captions. Maybe I'll write some of them in English.
You can follow them here, and on my Instagram @nettacanfi
Have you seen it?
Have you seen the reports from Kfar Aza and Kibbutz Be'eri?
From the Nova Music Festival?
You must.
If you are human you won't sleep after that but I think YOU HAVE TO KNOW.
YOU CAN'T NOT KNOW.
Because this happened on the same planet you live on. Not on another planet. This happened on YOUR world, and as a human being, you need to make a stand.
Stand with Israel.
Stand with Humanity.
And make it loud and clear.
You Can Help!
Donate to help Displaced Families
 Sorting Donations. Artist's rendering of my photo, by Issac Jacobs
>>Follow The full War Journal Here>>
Ever wondered WHERE Israel is?
Here's a map drill-down infographic, followed by a bunch of Q&A that I hope will put some things in order:

Living in Israel

Stories that illustrate what life in Israel is really like - for example, the Cafe-Kiosk where the wifi is free and everyone you meet has an idea for the next great startup :-)
Now let's eat:

We love to eat.
Israeli food is the delicious culmination of jewish eating traditions from kitchens all over the world ("you look pale, eat something"), meeting the fresh mediterranean diet.
Falafel and Humus, juice stands, sushi bars, steak houses, vegan menus and everything in between - we've got it all.
Sit in one of the fashionable sidewalk cafes in Tel Aviv, order a big salad and ice coffee, and you'll never want to leave :-)
Try the recipes for the classic Hummus recipe, and how to make Labane cheese:
Israel Weather and Climate

The weather in Israel is both a challenge and an opportunity.
For example, practically every house in has a solar water heater, and we solved the worst of our drinking water shortage with desalination technology.
Still, the heat is part of our daily life, so we need to find ways to live with it.
Find out how we save water,
And when you go shopping in Dizengof Center, make sure to visit the Hydroponic farm on the roof!
Whatever you do, please don't miss the warning about the Israeli SUN:
Graffiti

The writing's on the wall, especially here.
What I find so unusual about Israeli graffiti, is how much of it its text, or text based. Walking the streets of Tel Aviv is like reading a coded newspaper. Here's this wall for example, depicting the events of "the Tents Protest":
A
quick note about phonetic spelling:
There are lots of names and words on this site that are phonetic transcripts from Hebrew. The way to read them, and pronounce them, are according to the basic vowel sounds:
A – say "ah"
E – "eh"
I – "ee"
O – "oh"
U – "oo"
Follow Me on Instagram:
https://www.instagram.com/nettacanfi/
Copyright notice –
All visual material and other materials on this site are copyright of israel-illustrated.com, unless indicated otherwise.


Recent Articles
-
Children Drawing at War
Dec 07, 23 09:02 AM
 Children of Sderot, Israel, drawing their hopes and fears. I work with the evacuated kids now at the Dead Sea hotels, and what they draw is very revealing
 -
Israel 2023 - Illustrated War Journal by Netta Canfi
Oct 29, 23 04:39 PM
 An Illustrated War Journal, created in real time: Israeli artist Netta Canfi draws her experiences in the Israel-Hamas War.
 -
War Israel Hamas
Oct 10, 23 01:22 PM
 Hamas massacres Israeli civilians in music festival and Kibbutzim on Gaza border. Hostages taken into Gaza, at least 900 Killed
Home | Blog | Art and Culture | Coloring Pages | Covid19 in Israel | Life in Israel | WAR | Climate | Food
Contact Us | About | Legal
israel-illustrated.com / il-lustrated.com all rights reserved 2016-2023